|
469-298-1138
Home
Send In Form
FAQ's
Estimates
Feedback
Email A Tech
Search
Payment Types
Contact Us
Prices

ACCORD
ACURA
AUDI
BMW
BOSE
BUICK
CADILLAC
CHEVROLET
CHRYSLER
CIVIC
CL
CONTACT
CRV
FAQ
FEES
FEEDBACK
FORD
GM
HONDA
HYUNDAI
INTEGRA
ISUZU
INFINITI
LEGEND
LEXUS
MAZDA
MAXIMA
MERCEDES
NISSAN
NSX
ODYSSEY
PASSPORT
PATHFINDER
PONTIAC
PRELUDE
RL
SUBARU
SUBMIT
TL
SALE
TOYOTA
| |
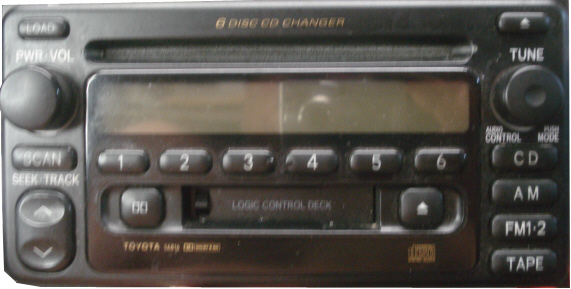
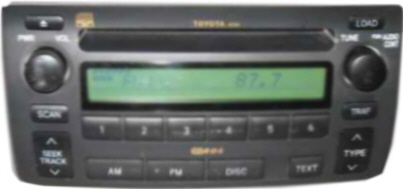
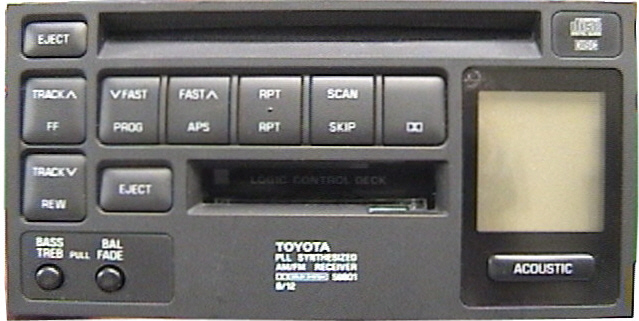
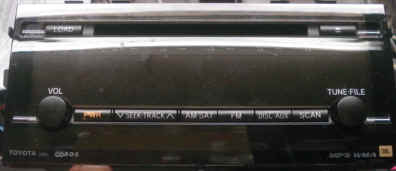
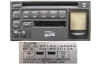
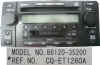
Toyota CD Changer Repairs

PRIUS 4-RUNNER HIGHLANDER CAMRY
SEQUOIA COROLLA AVALON OTHERS
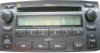
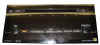
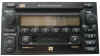
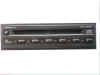
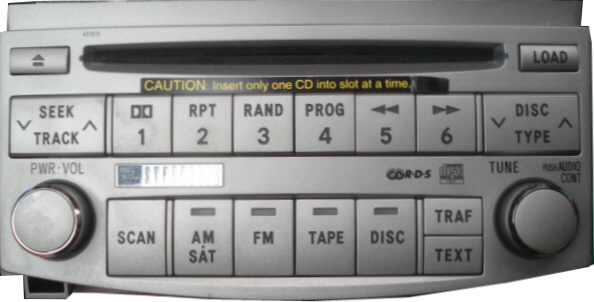
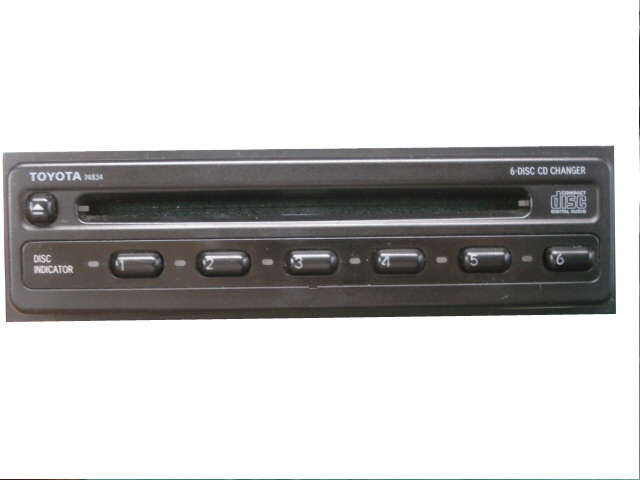
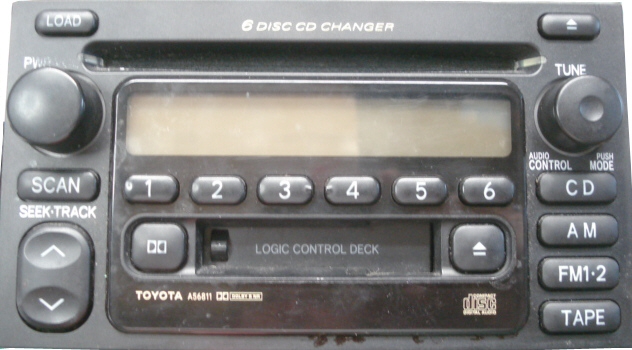
In Dash 6 Disc Changer
Some of the problems that we have
repaired are:
- Not switching to CD Changer when you press
the CD button
- Won't eject, load, or play CD's - what
to do to get my cd's out?
- Loud clicking each time you start the
vehicle
- Loads then says error and ejects the cd
- I used a cd with a label or sticker on it
(from library, church, or other) now jammed
- Coins and other stuff put in cd changer
- Error Codes
- Skipping or Pausing of CD being played
- Other problems (E-mail us with specifics)
Easy steps for the repair.
-
You have many options with something that isn't working
properly. The first step is to understand why you would want to repair instead
of replace the unit. See "Why is repairing a good
option"
-
Verify where the problem is and what needs to be repaired.
Many times this is obvious (like on cd players that skip) but sometimes not
so clear like sound that comes and goes (is it speaker, the amp, or stereo).
Email
a tech if you need help with figuring out where the problem is.
-
Review our estimate info here.
-
Remove it or have someone remove it for you.
-
Print off the Send in form to enclose with the
changer (all info needed is on the form, address, email, etc.)
-
Wrap it good with some bubble-wrap to protect.
-
All the carriers deliver here (UPS, USPS, FedEx, etc.) Allow under 1 week for
the repair, we'll contact you if need a few days longer for parts ordering.
-
Note: We will return everything that is sent in whether it's
cd's or brackets, all will be kept together.
Here are general removal tips, specific tips are linked from the vehicles model
page when available.
OEM Stereos do not require removing the knobs or faceplates as
they did decades ago. They generally come out to the front as a complete stereo.
The brackets that hold them in are usually just hidden by the dash trim that
surrounds it. These panels generally have a couple well hidden screws holding
them and then they usually will unsnap off, carefully. Once the stereo is out
away from the dash you will see the connectors have a tab type lock to squeeze
and release to unplug them.
2001 Toyota Highlander
2003 Toyota 4-Runner
98 Toyota 4-Runner
2000
Toyota Sienna LE Van

2001
Toyota Highlander
Removal
- The Plastic wood grain that goes around the stereo will unsnap off. Use a
regular screwdriver and gently pry until it snaps off, there are no screws
holding it. Once that is off, you can easily see the 6 10mm bolts to remove the
stereo, then the smaller phillips screws on the sides of the stereo to unbolt it
from the mount. You do have to take one
of the side mounts off in order for the radio to came backwards out of the
mount, very easily.
2003-2009
Toyota 4-Runner
Removing stereo:
The
portion in the center below the stereo that holds the clock has 1 screw holding
it in on the bottom of it. You have to open that little storage door (for cd's?)
to see the screw. Once the screw is out, that piece will pop out if gently pried
on with straight edged screwdriver (or your fingers) (it is about 5 inch square section with clock
on top and panel below) Once popped out, unplug the connector in back of it to
release the wiring for the clock. Now, below the steering wheel is a panel, in the bottom right corner is
a bolt that holds it snug, remove that bolt and now you can pull that panel
loose. It will come off the ignition and pull out about 5 inches. This will
allow you to see that there is another bolt just 1 inch to the right and behind
the one that you just took out, behind the panel, remove that one also. Notice that the piece that has
the cup holder and the shifter will unsnap up and off from the lower section of
the console between the seats, pop it up with the shifter out of park, you can
leave it plugged up and just rotate so it's out of the way. There is a small
thin woodgrain piece in front of the cup holders that pops off. Remove the 2 10mm bolts that anchor
the dash piece that are right below the stereo. Now the dash assembly that is to
the left and right sides of the stereo will pop loose. Slide this dash assembly
back just far enough that you can see the other 2 10mm bolts that are outside
and deeper from the 2 bolts right below the stereo were at. Here is the same
description of the 2 bolts, just reworded (the shiny bracket
that mounts the stereo has the 2 bolts under the stereo and another bolt outside
and deeper about 2 inches to the left and same to the right side.) Those 4 bolts
along the bottom of the stereo are all that hold it in, but it is too large to
come forward out the the dash assembly so it comes up and over it once that
piece is loose. The stereo will need to come out and up over
that front trim piece (which only comes about 6-8 inches forward to allow space
to get to the stereo. By tipping it up and face first over the dash assembly,
this will allow you to see and detach the connections on the back.
98
Toyota 4-Runner
Removing stereo:
(Front
side of and rear side means to the front direction or rear direction of the
vehicle).
The way that you move the panel that surrounds the stereo is by first pop up the
front side edge of the pocket that is the rear side of the shifter, just up an
inch. Then you pop the panel that surrounds the shifter. There are 2 screws
hidden behind the AC controls. To access them, start by pulling off the 2 round
knobs and the 2 small slide lever knobs, they just pull off. Then you need to
snap the faceplate off using a small screwdriver or similar to gently move it
around the little catches on the edges, it comes off. Remove the 2 screws and
then the panel, whole thing with vents, all unsnaps out. Move it around to allow
you to get to the 4 bolts that hold in the stereo. Precaution: The panel that
you are moving around to allow you to unbolt the stereo has metal clips on it
sticking out the back pointing straight at the stereos delicate plastic
faceplate. Just be careful not to let it touch the faceplate or it will scratch
an undesirable scratch.
1999 Sierra Van (stereo has small faceplate number AD6802) We
have repaired these cd players and not difficult to remove, just pop off the
dash piece that is around the stereo and unbolt the stereo.
2002
Toyota Camry
Removing stereo:
The
portion in the center above the stereo that holds the vents and hazard switch
will pop out. We found it to be a little tough to pop out. The section is held
in by 3 clips, 2 are on bottom corners and 2-3 inches back. The 3rd one is on
top right in the middle and above the hazard switch, it is only about an inch
deep. The whole assembly pops out and the front woodgrain doesn't come off of
it. Along the bottom the ashtray will pop out, the left side pops loose easier
then the right - right side you may need to use a screwdriver to gently pry. The
clip is about 3 inches deep below and to the right on the lighter. Once that
section is out then you can see a plastic strip that pops out to expose the 2
bolts along bottom. Once the 2 10mm bolts along the bottom and the 2 10mm bolts
along the top, then it will come out. Unplug connections and once assembly is
out then you can just remove the 4 bolts on each side of the stereo. This will
allow you to leave the temp controls in the bracket and put it back into the
dash.
2003
Toyota Sequoia
Removing stereo:
There
are 2 phillips screws near the top vents. Remove them and the section that goes
around the stereo will carefully unsnap off. Once that dash piece is moved you
will see the 4 screws that hold the stereo in.
|